- Home
- How to Fry Pork Chops
- How to Keep Breading from Falling Off When Frying Pork Chops
How to Keep Breading from Falling Off When Frying Pork Chops
How to keep breading on pork chops: Key tips for frying pork chops without losing the coating. Learn expert techniques!

The Secret to Perfectly Breaded Pork Chops
As someone who's at home in the kitchen more than anywhere else, I've had my fair share of culinary mishaps. Believe me, not all my first attempts at dishes were postable successes. I mention this to say that mastering the simple yet elusive technique of keeping breading on pork chops while frying took me a couple of tries—and several lessons learned the hard way. But once you nail this, it's like getting the crispy, juicy key to pork chop paradise!
Whether you're setting out to make your first-ever breaded pork chop or want to refine your technique, you've come to the right place. I’ll share with you a solid, fool-proof method that ensures your breading sticks to the pork chops from pan to plate. Let’s get into the kitchen!
Why Does Breading Fall Off?
Understanding the 'why' can sometimes help us perfect our culinary techniques. When it comes to frying breaded pork chops, several factors can cause that crispy coating to detach:
- Moisture: Pork chops naturally contain moisture, which can steam into the breading and loosen it during cooking.
- Not enough drying: Skipping the step of thoroughly drying the pork chops means there's a wet barrier between the meat and the breading, meaning less crispiness.
- Improper adhesion: The lack of a proper glue-like intermediary (typically flour and eggs) between the pork chop and the breadcrumbs is often the culprit.
- Frying temperature too high or too low: Too high, and the breading will burn before the meat is done; too low, and it soaks up oil and falls off.
Ingredients for Success
Before we jump into the actual steps, let's ensure you have everything you'll need to make stunning, stay-put breaded pork chops:
- Pork chops - bone-in or boneless, about 1 inch thick
- Salt and pepper
- All-purpose flour
- Eggs
- Milk
- Breadcrumbs (panko for extra crispiness)
- Vegetable oil for frying
Now that you have your ingredients lined up, let's move on to the technique.
Step-by-Step Guide to Breading that Sticks
1. Prep Your Pork Chops
Start by patting your pork chops dry with a paper towel. This removes excess moisture, offering the first crucial component for breading that sticks. Season each side generously with salt and pepper. This not only adds flavor but can also help absorb any remaining moisture.
2. Create Your Breading Stations
Set up three shallow dishes for an efficient breading process. In the first, place your flour. In the second, beat together the eggs and milk—this will serve as the 'glue'. In the third, have your breadcrumbs ready.
3. Dip and Dredge
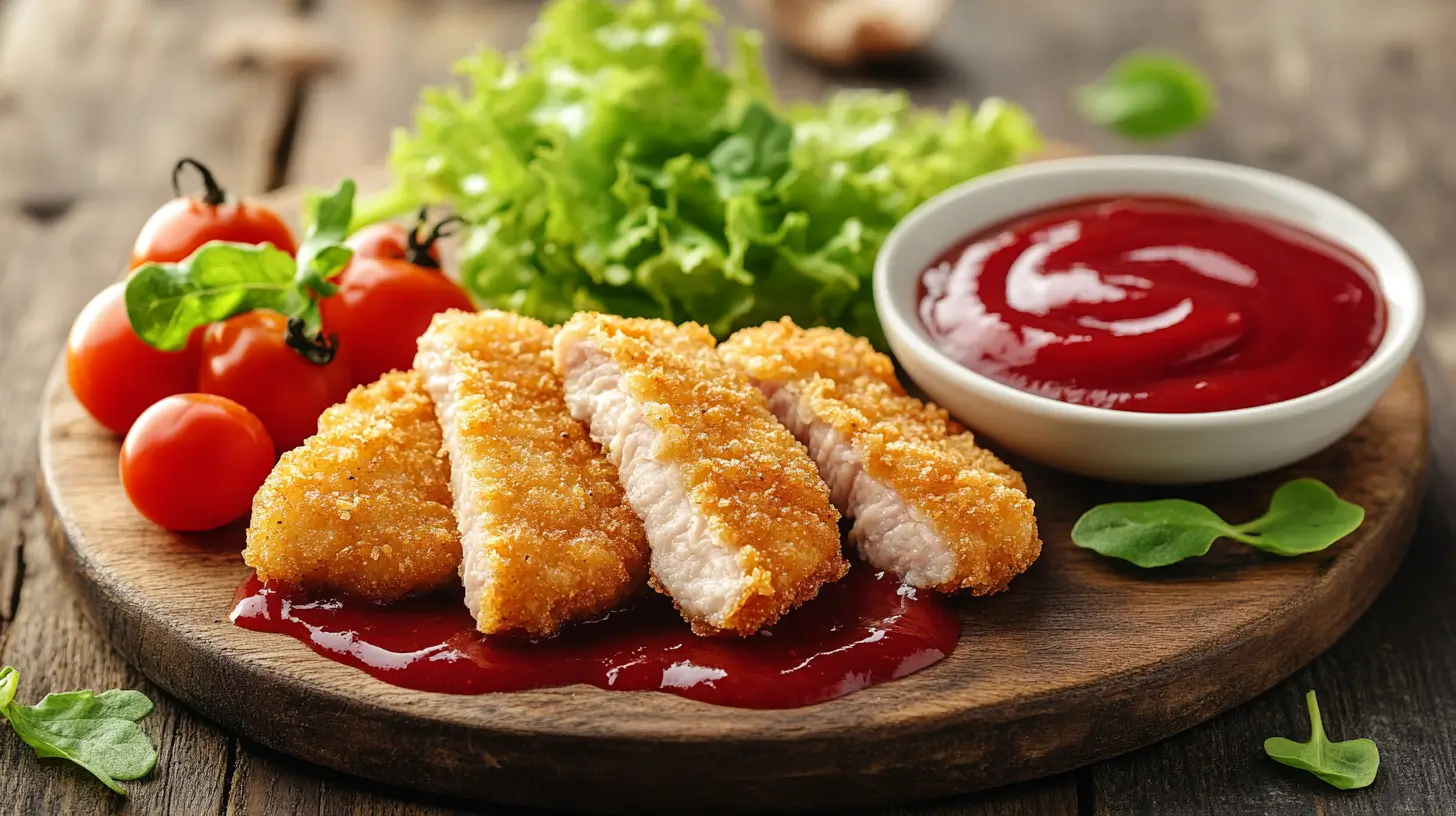
Take a prepped pork chop and coat it lightly but thoroughly in the flour. This dry coat helps the wet ingredients stick better. Dip the floured chop into the egg mixture, ensuring it's evenly coated. Lastly, press it into the breadcrumbs. Here's my little secret: Gently press the breadcrumbs onto the surface to ensure they adhere well.
4. Let Them Set
Once all your pork chops are breaded, let them rest on a wire rack for about 10 minutes. This waiting time helps the breading solidify a bit and adhere better to the meat.
5. Fry to Perfection
Heat the oil in a large skillet over medium heat. You're aiming for about 350°F, perfect for cooking the pork chops thoroughly without burning the coating. Cook each pork chop until golden brown and crispy, about 4 to 5 minutes per side. Avoid moving them around too much as they cook.
Final Touches and Serving Suggestions
Once cooked, place the pork chops on a clean wire rack. This prevents the bottom from getting soggy, keeping your breading crisp and intact all around. Serve these beauties hot, perhaps with a squeeze of fresh lemon, some homemade apple sauce, or a creamy mustard sauce. They're versatile!
Takeaway
Mastering the art of keeping breading on pork chops can elevate your cooking game massively, opening doors to all kinds of delicious breaded dishes. Remember, practice makes perfect, and a little patience goes a long way. I’ve shared what I’ve learned in my culinary adventures. Now, it's your turn to turn your kitchen into a stage for crispy, delicious masterpieces. Happy cooking!


